
Jiffy Upgrade to 4.7
Last Updated: Jun 30, 2023
Last Updated: Jun 30, 2023
| Package Name | Till 4.6 Jiffy Version | 4.7 Jiffy Version |
|---|---|---|
| Postgres - DB server version | 12.4 | 14.2 |
| Mongo | 4.0.19-1 | 4.2.19 |
| .Net Framework | 4.7.2 | 4.8 + |
| Python | 3.7.9 | 3.10.3 |
| Vault | 1.8.5 | 1.10.0 |
| Nginx | 1.17.8 | 1.20.2 |
| RabbitMQ | 3.8.2 | 3.9.14-1 |
| erlang | 22.3.4.6-1 | 23.3.4.11-1 |
| Drill | 1.17 | 1.19.0 |
| Redis | 6.0.5 | 6.2.6 |
| ZooKeeper | 3.4.8 | 3.7.0 |
| llvm-toolset-7-clang | NA | 5.0.1-4 |
| libicu | NA | 50.2-4 |
The following Jiffy versions can do a direct upgrade to version 4.7.
| Name | Version | Type | Description |
|---|---|---|---|
| jiffy-playbook.tar.gz | 4.7 | Ansible playbook | Ansible scripts which does the upgrade |
| jiffy-upgrade.tar.gz | 4.7 | Compressed tar | Jiffy core artifacts |
| jiffy-helms-v4.7.zip | 4.7 | Helm charts | Helm charts for container deployments |
| Chart Change | Affected charts | Change |
|---|---|---|
| removed .ht from jiffy-auth k8s secret |
|
templates/deployment.yaml  |
| MASTERKEY is now read from the pod environment variables instead of reading from file inside the pod. |
|
templates/deployment.yaml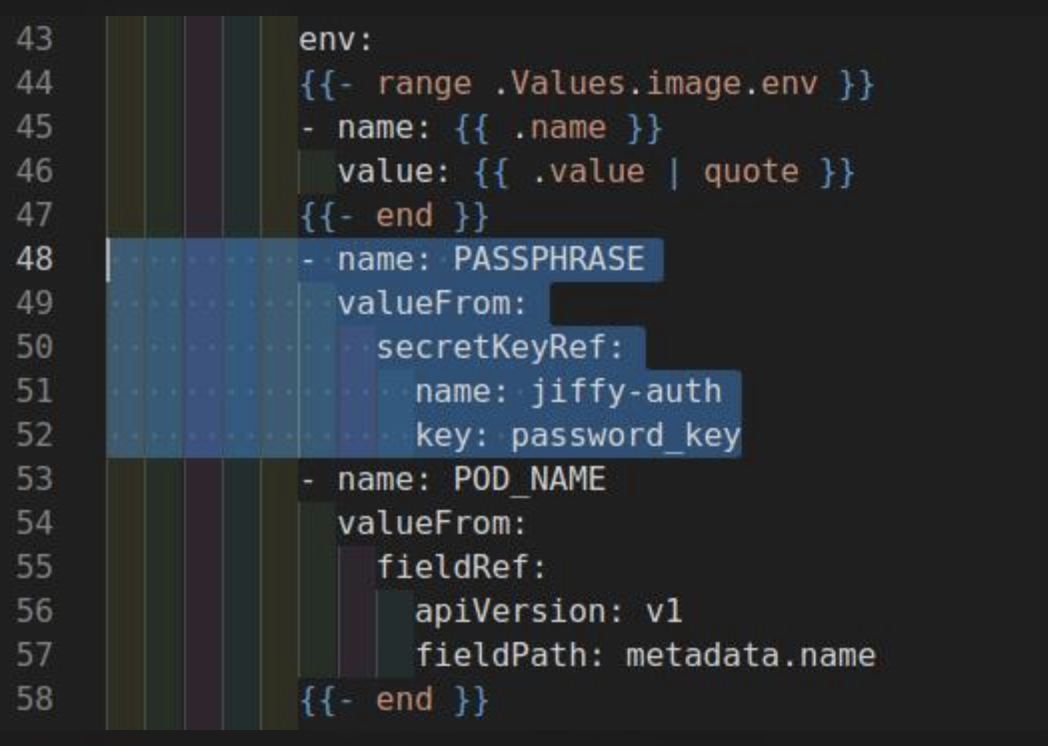 |
| pod configured to use jiffy-auth secret |
|
|
| pod configured to use services-properties configmap | template-converter |
- application stop all
- application stop vault
- pg_dump -h {DB hostname} -p 5432 {jiffy-schema-name} -U {username} | gzip > {filename.gz}
- pg_dump -h {DB hostname} -p 5432 {gus-schema-name} -U {username} | gzip > {filename.gz}
Command will prompt for DB admin password.mongodump --ssl --host {MongoDB hostname} --port 27017 --sslPEMKeyFile {Keyfile the certificate is a combination of ca+cert} --sslAllowInvalidCertificates --authenticationDatabase admin -u admin --out {filename.dump}
- export JIFFY_INSTALL=“/tmp/jiffy-install/4.7/”
- mkdir -p $JIFFY_INSTALL/helm/
- cd $JIFFY_INSTALL/helm/
- wget –user {username} –ask-password downloads.jiffy.ai/4.7/Upgrade/jiffy-helms-v4.7.zip
unzip jiffy-helms-v4.7.zip
- cd $JIFFY_INSTALL
- wget –user {username} –ask-password downloads.jiffy.ai/4.7/Upgrade/jiffy-playbook.tar.gz
- wget –user {username} –ask-password downloads.jiffy.ai/4.7/Upgrade/jiffy-upgrade.tar.gz
- tar -xf jiffy-playbook.tar.gz
- tar -xf jiffy-upgrade.tar.gz -C $JIFFY_INSTALL/upgrade/
For RHEL:
Package Name
To install llvm-toolset-7-clang follow the steps below:
- subscription-manager repos --enable rhel-7-server-devtools-rpms
- subscription-manager repos --enable rhel-server-rhscl-7-rpms
- cd /etc/pki/rpm-gpg
- wget -O RPM-GPG-KEY-redhat-devel https://www.redhat.com/security/data/a5787476.txt
- rpm --import RPM-GPG-KEY-redhat-devel
- yum install http://mirror.centos.org/centos/7/os/x86_64/Packages/libedit-devel-3.0-12.20121213cvs.el7.x86_64.rpm
- yum install llvm5.0-devel
- yum install llvm-toolset-7-clang -y
For Centos:
Ansible playbook will handle installing llvm-toolset-7-clang and postgresql-devel
Common steps (as root user)
- export JIFFY_INSTALL=“/tmp/jiffy-install/4.7/”
- cd $JIFFY_INSTALL/upgrade/
- chmod u+x presetup.sh
- ./presetup.sh
The following steps will cover code backup, in case of rollback to a previously installed version.
source /opt/jiffy3rdparty/ansibleEnv/bin/activate
For debug mode
- export JIFFY_INSTALL="/tmp/jiffy-install/4.7/"
- cd $JIFFY_INSTALL
- ansible-playbook pre-upgrade/root.yml -i inventory -e @variable.yml
For detailed debug mode:ansible-playbook pre-upgrade/root.yml -i inventory -e @variable.yml -v
ansible-playbook pre-upgrade/root.yml -i inventory -e @variable.yml -vvvv
chown -R {jiffyapp linux user}:{jiffyapp linux user group} /tmp/jiffy-install
source /opt/jiffy3rdparty/ansibleEnv/bin/activate
For debug mode:ansible-playbook pre-upgrade/non-root.yml -i inventory -e @variable.yml
For detailed debug mode:ansible-playbook pre-upgrade/non-root.yml -i inventory -e @variable.yml -v
ansible-playbook pre-upgrade/non-root.yml -i inventory -e @variable.yml -vvvv
During the upgrade, ulimits value on the DB server will be updated.
source /opt/jiffy3rdparty/ansibleEnv/bin/activate
For debug mode:
- export JIFFY_INSTALL="/tmp/jiffy-install/4.7"
- cd $JIFFY_INSTALL
- ansible-playbook upgrade/root.yml -i inventory -l core -e @variable.yml
For detailed debug mode:ansible-playbook upgrade/root.yml -i inventory -l db -e @variable.yml -v
ansible-playbook upgrade/root.yml -i inventory -l db -e @variable.yml -vvvv
source /opt/jiffy3rdparty/ansibleEnv/bin/activate
For debug mode:
- export JIFFY_INSTALL="/tmp/jiffy-install/4.7/"
- cd $JIFFY_INSTALL
- ansible-playbook upgrade/root.yml -i inventory -l core -e @variable.yml
For detailed debug mode:ansible-playbook upgrade/root.yml -i inventory -l core -e @variable.yml -v
For sudo and ssh password prompt add -kK options along with run command:ansible-playbook upgrade/root.yml -i inventory -l core -e @variable.yml -vvvv
ansible-playbook upgrade/root.yml -i inventory -l core -e @variable.yml -kK
chown -R {jiffyapp linux user}:{jiffyapp linux user group} /tmp/jiffy-install
source /opt/jiffy3rdparty/ansibleEnv/bin/activate
For debug mode:
- export JIFFY_INSTALL="/tmp/jiffy-install/4.7/"
- cd $JIFFY_INSTALL
- ansible-playbook upgrade/non-root.yml -i inventory -l core -e @variable.yml
For detailed debug mode:ansible-playbook upgrade/non-root.yml -i inventory -l core -e @variable.yml -v
ansible-playbook upgrade/non-root.yml -i inventory -l core -e @variable.yml -vvvv
without masterkey prompt:ansible-playbook jiffyconfiguration.yml -l core -e @variable.yml
ansible-playbook jiffyconfiguration.yml -l core -e masterKey='{replaceme}' -e @variable.yml
- application start all
- cd $JIFFY_HOME/.vault.d/
- nohup vault server -config=startupconfig.hcl >vault_$(date +%Y%m%d_%H%M%S).log 2 >&1 &
- vault operator unseal {unseal key 1}
- vault operator unseal {unseal key 2}
- export JIFFY_INSTALL="/tmp/jiffy-install/4.7/"
- cd $JIFFY_INSTALL/helm/
- chmod 777 k8s-upgrade.sh
- Remove jiffy-auth secrets
- kubectl delete secret jiffy-auth -n jiffy-cognitive
- Create jiffy-auth secrets
- kubectl create secret generic jiffy-auth --from-literal=password_key='[masterkey}' --from-file={mountpoint}/jiffy/auth/.at -n jiffy-cognitive
- namespace(n)=jiffy-cognitive
- replicacount(r)=1
- mountpoint(m)=/opt
helm uninstall docplit -n {namespace}
./k8s-upgrade.sh -k '{masterkey|mandatory}' -n {namespace} -c {clusterDNS|mandatory} -r {replicacount} -m {mountpoint}
Nginx on the core server has to be restarted by the user with elevated privileges.
- /opt/nginx/sbin/nginx -s stop
- systemctl start jiffy-nginx
As the jiffy application user, execute the below commands to modify/apply DRILL_MEMORY parameters
- #!/bin/bash
- sed -i 's/^#export DRILL_HEAP=${DRILL_HEAP:-"4G"}/export DRILL_HEAP=${DRILL_HEAP:-"8G"}/g' $DOCUBE_HOME/drill/conf/drill-env.sh
- sed -i 's/#export DRILL_MAX_DIRECT_MEMORY=${DRILL_MAX_DIRECT_MEMORY:-"8G"}/export DRILL_MAX_DIRECT_MEMORY=${DRILL_MAX_DIRECT_MEMORY:-"16G"}/g' $DOCUBE_HOME/drill/conf/drill-env.sh
- application stop all
- application start all
Verify the DRILL_MAX_HEAP_MEMORY on the drill configuration file.
cat $DOCUBE_HOME/drill/conf/drill-env.sh
rabbitmq-plugins enable rabbitmq_prometheus
add this line:vi /etc/rabbitmq/rabbitmq.conf
Restart rabbitmqprometheus.return_per_object_metrics = true
systemctl restart rabbitmq-server
Verification:
cat $JIFFY_HOME/productversion.txt
cat $JIFFY_HOME/data/client/setup/version.txt
supervisorctl status
kubectl get pods -n {namespace}
vault status