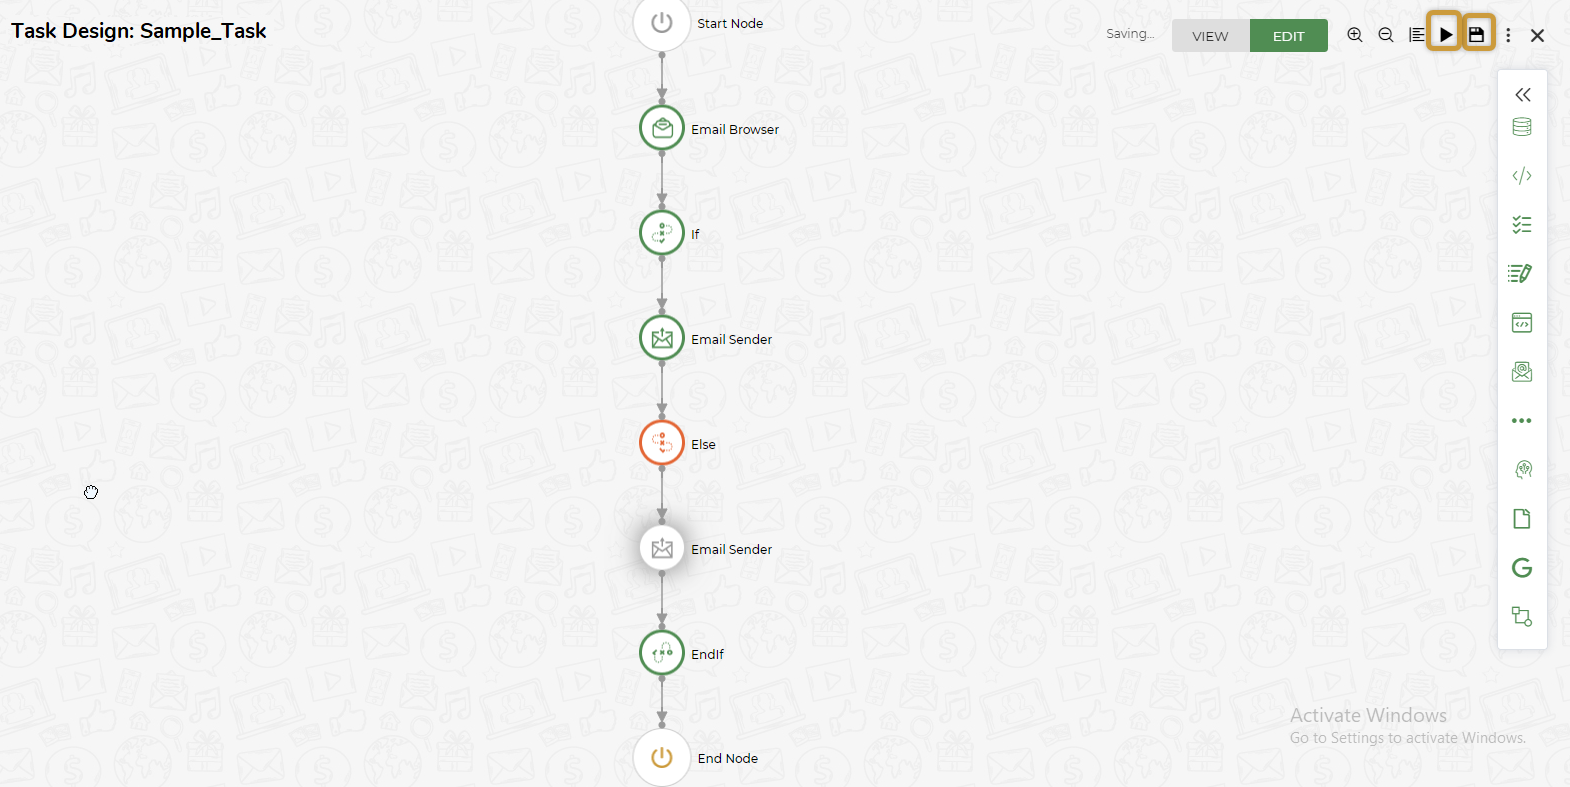
The following sample task is created using the Email Browser, If, Email Sender, Else, and EndIf nodes to automate the following process:
- Browsing Emails from the specified Email address
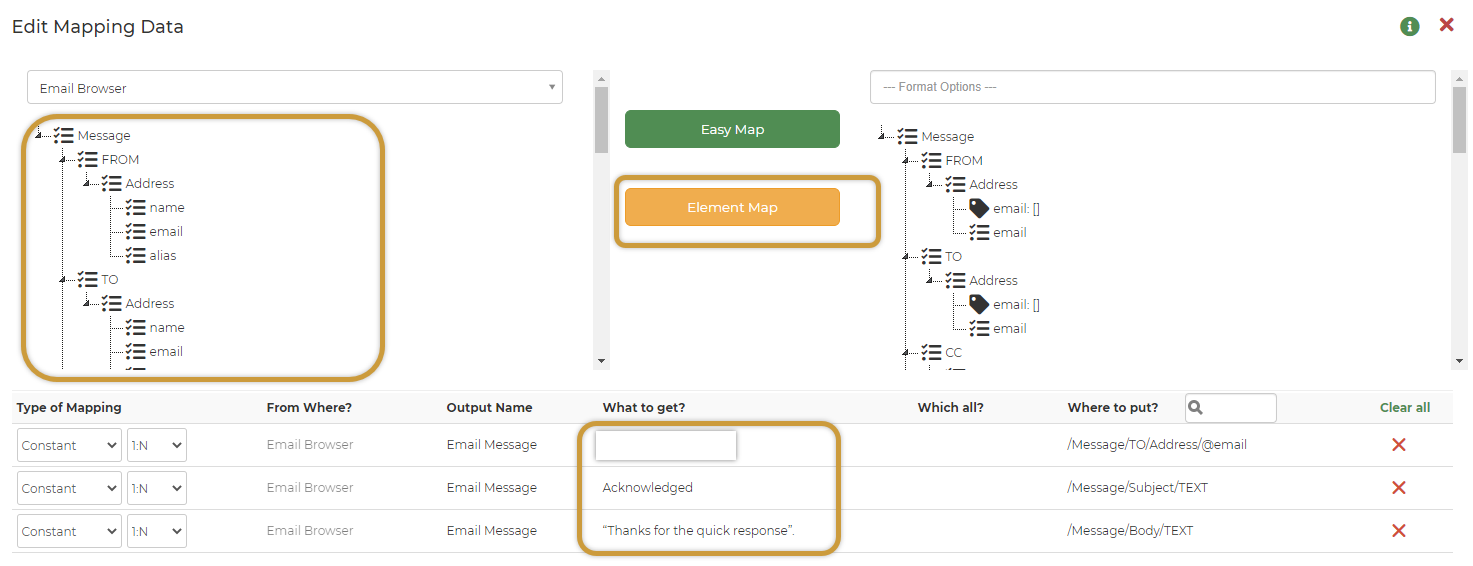
- If an Email is received from a specified user, for example (John), an automatic reply is sent to the user that says, “Thanks for the quick response”.
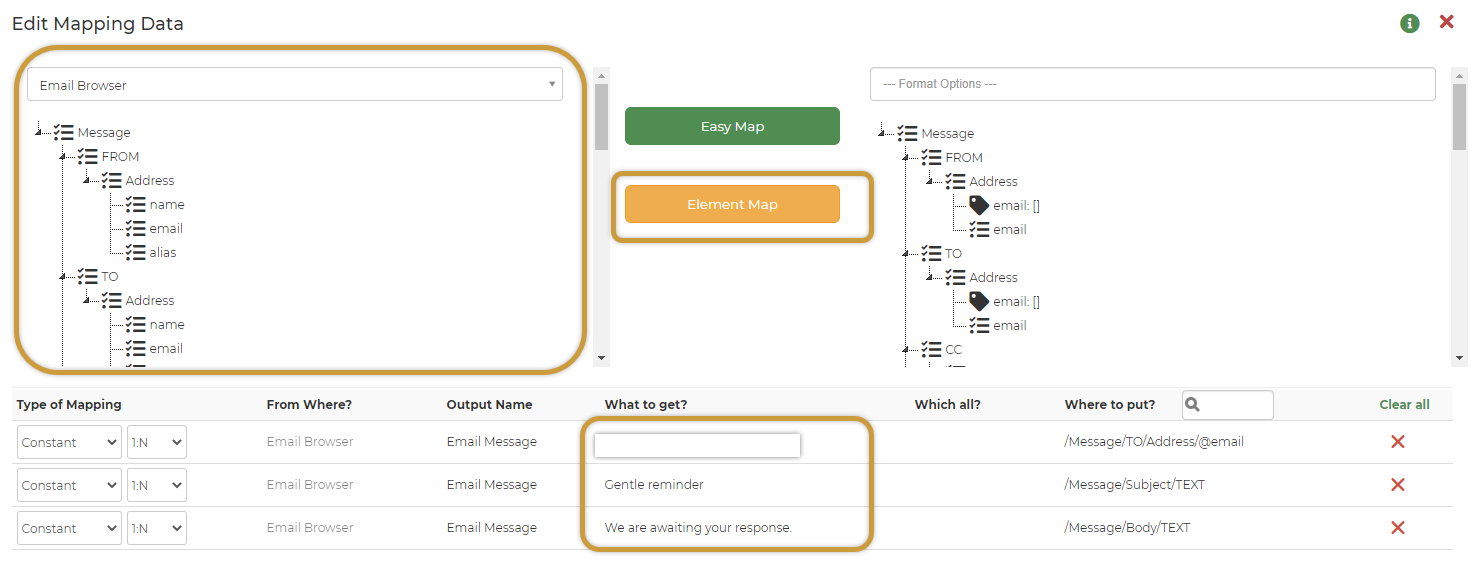
- Else, an Email is sent to the specified user (John) requesting for the
response as soon as possible.
Before automating any task, the user must refer to the Tasks section
for a basic understanding on the following details:
- How to create a task
- Various options available in the Task Design screen.
Do the following to automate the above process:
- In the Task Design screen, click on the << icon present on the right-hand side toolbar to expand the Nodes section.
- Drag and drop the Email Browser, If, Email Sender, Else, and EndIf nodes respectively from the Nodes section and align them in the following order:
Make sure that the Task Design screen is in Edit mode (the Edit button is highlighted in green colour).
- Double-click on the Email Browser node.
- Select any existing configuration if it matches the criteria of the user
or create a new configuration. Refer to Setting up Email Configuration
section for more details.
- Click on the Properties tab and select the INBOX option from the
Search in folder list box. Refer to the Email Properties section
for more details.
- Click on the Actions tab.
- The Email is browsed based on the conditions specified in the Actions tab.
- Select the All option from the list box (1).
- Click on the + icon and select the FROM option from the list box (2).
- Select the has option from the list box (3).
- Select the Constant option from the list box (4).
- Type the required name, for example: John.
- Click on the Close icon.
- Click on the mapping line between Email Browser node and If node. Select the status field and then click on the ADD button.
- Double-click on the If node.
- Select the All option from the list box (6) and then select the + icon.
- Select the V (variable) option and then select the status option from the list box (7).
- Select the == option from the list box (8).
- Select the V (variable) option and then type PASS (9).
The above process indicates that if the status is PASS
which means there exists an Email from John, If node is
executed and a required Email will be sent using Email Sender node.
- Double-click on the mapping line between If node and Email
Sender node.
- Select the following fields one-by-one from the left-hand side section:
- /Message/TO/Address/@email
- /Message/Subject/TEXT
- /Message/Body/TEXT
- In the What to get? Column, type the Email address to which an Email must be sent, type the Subject of the Email, type the body
text.
- Click on the Close icon.
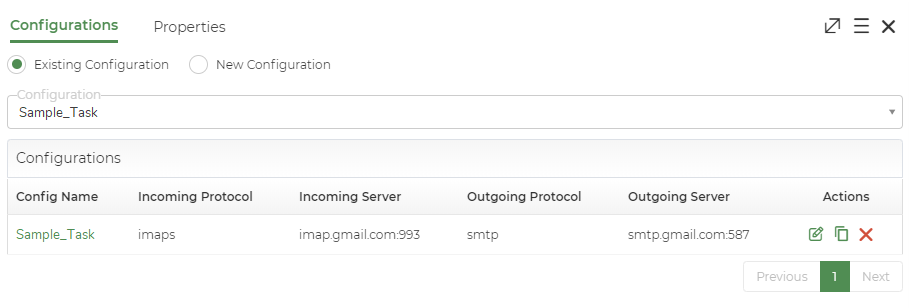
- Double-click on the Email Sender node.
- Select the required existing configuration.
The Email will be sent based on the details provided in
the configuration.
- Double-click on the mapping line between If node and Email Sender
node.
- Select the following fields one-by-one from the left-hand side section:
- /Message/TO/Address/@email
- /Message/Subject/TEXT
- /Message/Body/TEXT
- In the What to get? Column, type the Email address to which an Email must be sent, type the Subject of the Email, type the body text.
- Click on the Close icon.
- Click on the Save icon and then click on the Trail run icon.
In the above example, there exists an Email from John
and an automatic reply is sent.


