
Jiffy Installation
Last Updated: Jan 28, 2022
Last Updated: Jan 28, 2022
- Download helm charts into jiffycore server: wget –user {username} –ask-password downloads.jiffy.ai/4.6/Release/jiffy-helms-v4.6.zip
- Extract the helm charts in jiffycore server: unzip jiffy-helms-v4.6.zip
If antivirus software is installed in the server: Jiffy, RabbitMQ, and Nginx installation directories must be whitelisted and do not allow these directories to scan through antivirus software.
Recommended Repositories
| For RHEL Users | For CentOS |
|---|---|
| rhel-7-server-rpms | epel-release |
| rhel-7-server-extras-rpms | centos-release-scl |
| rhel-7-server-optional-rpms | pypi.org |
| rhel-server-rhscl-7-rpms | |
| epel-release | |
| pypi.org |
Download Artifacts to under /tmp/{jiffy-install} in core server
- wget –user {username} –ask-password downloads.jiffy.ai/4.6/Release/jiffy-installation.tar.gz
- wget –user {username} –ask-password downloads.jiffy.ai/4.6/Release/jiffy-playbook.tar.gz
Contact support@jiffy.ai for the login credentials to download artifacts.
Extract the ansible-playbook tar file in the core server (tar -xf jiffy-playbook.tar.gz). The extracted files include the inventory and variable.yml.
Inventory file has to be filled as per the user environment(contains all the details of the servers and authentication methods)). View the sample inventory file here.
Variables file has to be filled as per the user environment(contains all the parameters, such as, username, configurable values, mountpoint, etc.). View the sample variables file here.
openssl x509 -outform der -in localhost_cert.pem -out saml-public-key.crt
openssl pkcs8 -topk8 -inform PEM -outform DER -in localhost_key.pem -out saml-private-key.pk8 -nocrypt
| Component | Port | Process | Source | Destination |
|---|---|---|---|---|
| Jiffy Web | 443 | Nginx | Any windows machine from where user is going to access Jiffy application | Core Application Server |
| JPipe gRPC | 443 | Nginx | All the windows client machines where BOT is installed | Core Application Server |
| RabbitMQ Viewer | 15672 | RabbitMQ | Any windows machine from where user is going to access RabbitMQ web page | Core Application Server |
| MongoDB | 27017 | MongoDB | Core Application Server | Database Server |
| Postgres | 5432 | Postgres | Core Application Server | Database Server |
| Kubernetes Server | 443 | Nginx Ingress | Core Application Server | Kubernetes Server |
| Email Server (TCP Ports) | 25 | SMTP Server | Core Application Server | |
| Email Server | 993 | IMAP/IMAPS | Core Application Server | |
| LDAP Server | 389 | LDAP | Core application server | LDAP Server |
- create namespace jiffy-cognitive
- kubectl create namespace jiffy-cognitive
- commands to setup creds for imagepull
- kubectl apply -f imagepull-creds.yml -n jiffy-cognitive
- create classic load balancer
- update certificate arn in the controller service
- service.beta.kubernetes.io/aws-load-balancer-ssl-cert
- kubectl apply -f ingress-nginx.yaml
- For installing opendistro elastic search and kibana
- Update opendistro-es/values.yml with hostname values
- Line no 94 and 436
- helm install opendistro opendistro-es -n jiffy-cognitive
- For installing fluentd daemonset
- helm install fluentd fluentd -n jiffy-cognitive
Switch to jiffy/non-root user in the jiffy core server.
cd /tmp/{jiffy-install}
The extracted files include the inventory and variable.yml files in the /tmp/{jiffy-install} folder.tar -xf jiffy-playbook.tar.gz
Switch to root user in the jiffy core server(Keep the DB server's root credentials near at hand)
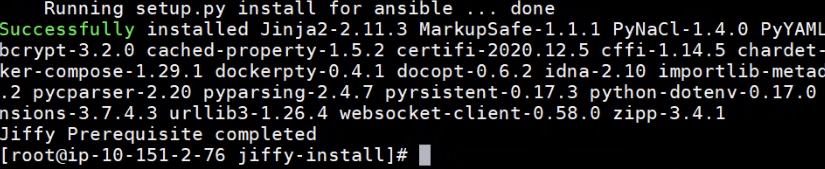
- Grant the permission to shell script and trigger the preAnsibleSetup.sh
- chmod u+x preAnsibleSetup.sh
- ./preAnsibleSetup.sh
Wait for the setup to complete.
source {mountpoint}/jiffy/.envs/ansibleEnv/bin/activate
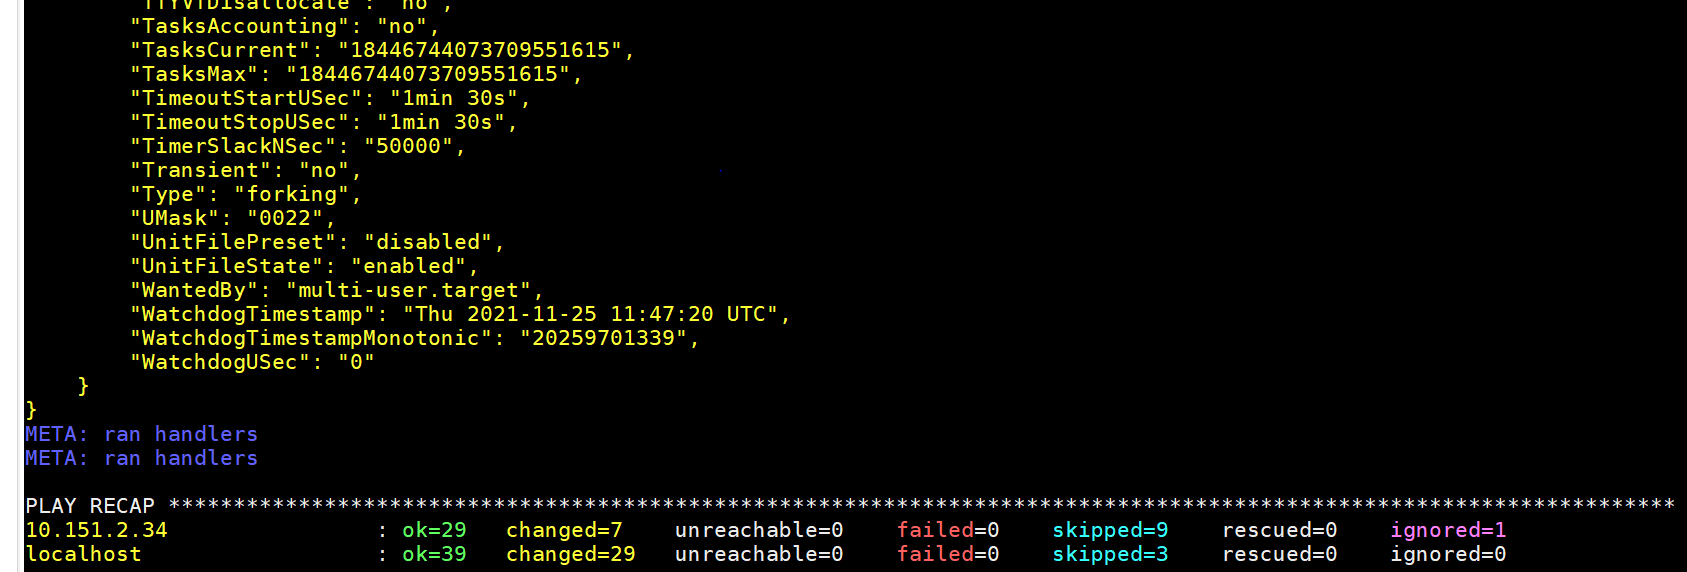
- ansible-playbook root.yml -i inventory -e @variable.yml
- For debug mode
- ansible-playbook root.yml -i inventory -e @variable.yml -v
- For detailed debug mode
- ansible-playbook root.yml -i inventory -e @variable.yml -vvvv
- For sudo and ssh password prompt add -kK options along with run command
- ansible-playbook root.yml -i inventory -e @variable.yml -kK
Wait for the setup to complete.
chown -R {jiffyapp linux user}:{jiffyapp linux user} /tmp/{jiffy-install}
Switch to jiffy/non-root user in the jiffy core server
- source {mountpoint}/jiffy/.envs/ansibleEnv/bin/activate
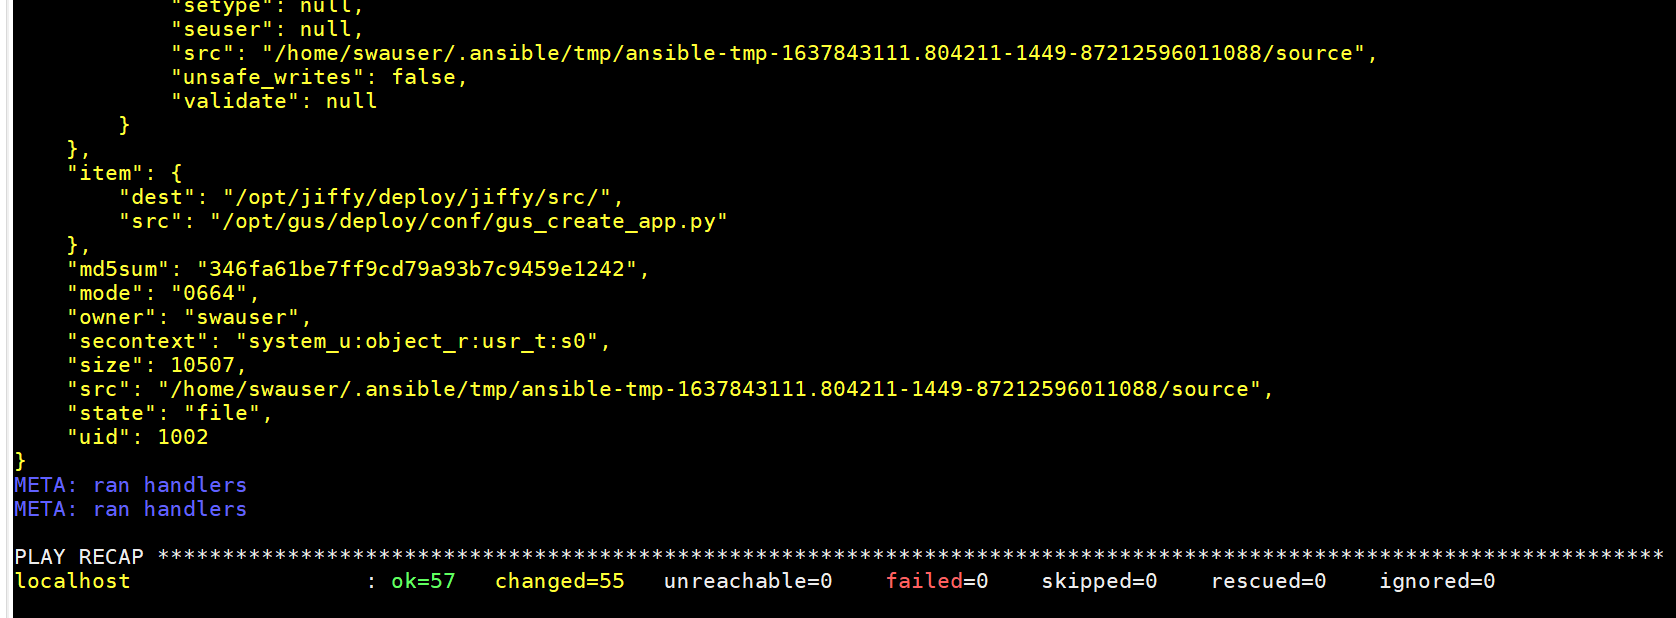
- ansible-playbook non-root.yml -i inventory -e @variable.yml
- For debug mode,
- ansible-playbook non-root.yml -i inventory -e @variable.yml -v
- For detailed debug mode,
- ansible-playbook non-root.yml -i inventory -e @variable.yml -vvvv
Wait for the setup to complete.
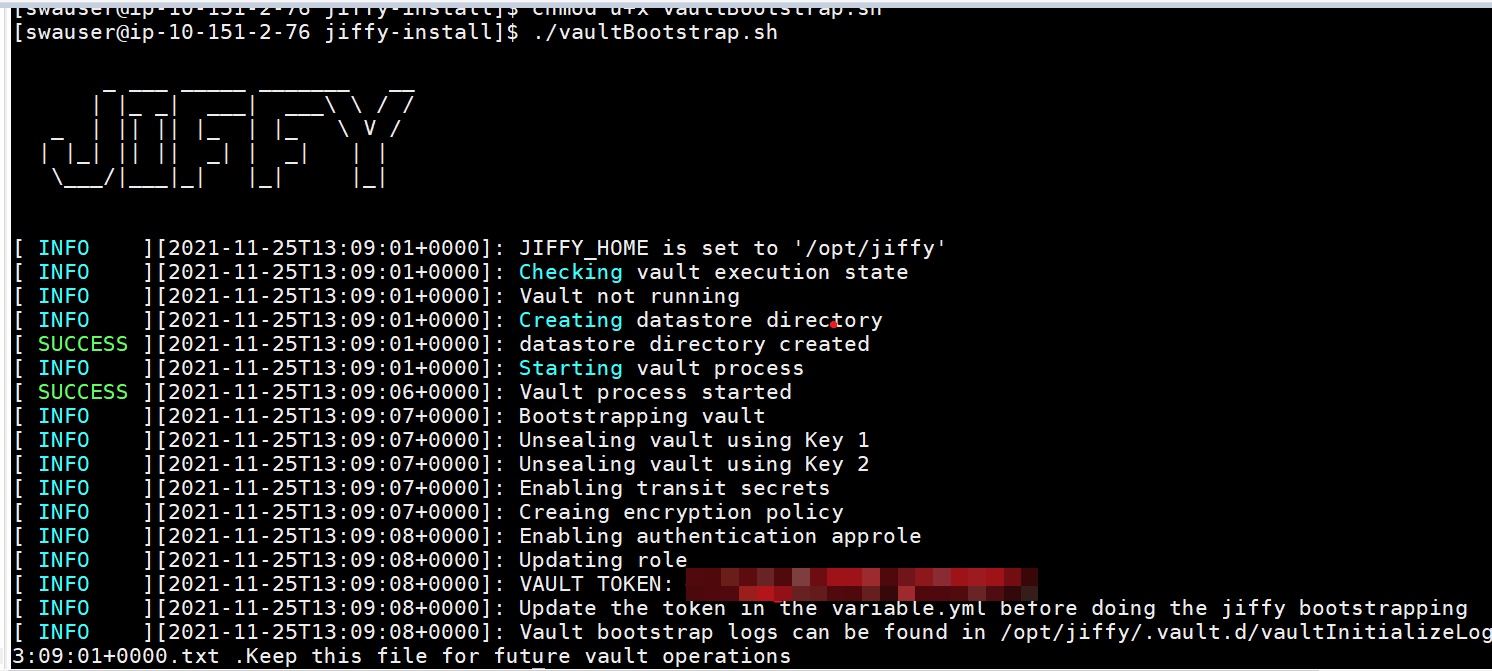
- Grant execute permission and execute vaultBootstrap.sh
- source ~/.bashrc
- chmod u+x vaultBootstrap.sh
- ./vaultBootstrap.sh
- with masterkey prompt:
- ansible-playbook jiffybootstrap.yml -e @variable.yml
- without masterkey prompt:
- ansible-playbook jiffybootstrap.yml -e masterKey='{replaceme}' -e @variable.yml
- Create jiffy-auth secrets
- kubectl create secret generic jiffy-auth --from-file={mountpoint}/jiffy/auth/password_key --from-file={mountpoint}/jiffy/auth/.at --from-file={mountpoint}/jiffy/auth/.ht -n jiffy-cognitive
- create configmap
- kubectl create configmap services-properties --from-file={mountpoint}/jiffy/ml/config/services.properties -n jiffy-cognitive
- commands to deploy Kubernetes pods
- export clusterDNS="{clusterDNS}"
- helm install portfolio portfolio/ --set ingress.host=$clusterDNS --set image.tag=JARVIS-MAIN-Portfolio_21113Nov21 --set image.repository=jiffyai/portfolio --set replicaCount=1 --set image.namespace=jiffy-cognitive -n jiffy-cognitive
- helm install pdfsplit pdfsplit/ --set ingress.host=$clusterDNS --set image.tag=JARVIS-MAIN-Pdfsplit_3524Nov21 --set image.repository=jiffyai/pdfsplit --set replicaCount=1 --set image.namespace=jiffy-cognitive -n jiffy-cognitive
- helm install bolml bolml/ --set ingress.host=$clusterDNS --set image.tag=JARVIS-MAIN-T4.3.012806Oct21 --set image.repository=jiffyai/bolml --set replicaCount=1 --set image.namespace=jiffy-cognitive -n jiffy-cognitive
- helm install bolcategory bol_category/ --set ingress.host=$clusterDNS --set image.tag=JARVIS-MAIN-vendorcategorisation_7506Oct21 --set image.repository=jiffyai/bolcategory --set replicaCount=1 --set image.namespace=jiffy-cognitive -n jiffy-cognitive
- helm install handwritingsegmentation handwritingsegmentation/ --set ingress.host=$clusterDNS --set image.tag=JARVIS-MAIN-HWSegmentaion_6615Nov21 --set image.repository=jiffyai/hwsegmentation --set replicaCount=1 --set image.namespace=jiffy-cognitive -n jiffy-cognitive
- helm install invoicecategory invoicecategory/ --set ingress.host=$clusterDNS --set image.tag=JARVIS-MAIN-T4.3.012806Oct21 --set image.repository=jiffyai/invoicecategory --set replicaCount=1 --set image.namespace=jiffy-cognitive -n jiffy-cognitive
- helm install pdf2image pdf2image/ --set ingress.host=$clusterDNS --set image.tag=JARVIS-MAIN-Pdf2Image_3206Oct21 --set image.repository=jiffyai/pdf2image --set replicaCount=1 --set image.namespace=jiffy-cognitive -n jiffy-cognitive
- helm install pdf2json-service pdf2json-service/ --set ingress.host=$clusterDNS --set image.tag=JARVIS-MAIN-Pdf2JsonService_4725Nov21 --set image.repository=jiffyai/pdf2json-service --set replicaCount=1 --set image.namespace=jiffy-cognitive -n jiffy-cognitive
- helm install template-converter template-converter/ --set ingress.host=$clusterDNS --set image.tag=JARVIS-MAIN-132 --set image.repository=jiffyai/template-converter --set replicaCount=1 --set image.namespace=jiffy-cognitive -n jiffy-cognitive
- helm install w2split w2split/ --set ingress.host=$clusterDNS --set image.tag=JARVIS-MAIN-W2Split_6712Nov21 --set image.repository=jiffyai/w2split --set replicaCount=1 --set image.namespace=jiffy-cognitive -n jiffy-cognitive
- helm install backward-comp backward-comp/ --set ingress.host=$clusterDNS --set image.tag=JARVIS-MAIN-BackwardCompatibilityEngine3406Oct21 --set image.repository=jiffyai/backward-compatibility-engine --set replicaCount=1 --set image.namespace=jiffy-cognitive -n jiffy-cognitive
- helm install functionator functionator/ --set ingress.host=$clusterDNS --set image.tag=JARVIS-MAIN-147 --set image.repository=jiffyai/functionator --set replicaCount=1 --set image.namespace=jiffy-cognitive -n jiffy-cognitive
- helm install invoiceml invoiceml/ --set ingress.host=$clusterDNS --set image.tag=JARVIS-MAIN-T4.3.012806Oct21 --set image.repository=jiffyai/invoiceml --set replicaCount=1 --set image.namespace=jiffy-cognitive -n jiffy-cognitive
- helm install w2ml w2ml/ --set ingress.host=$clusterDNS --set image.tag=JARVIS-MAIN-w2ml_3911Nov21 --set image.repository=jiffyai/w2ml --set replicaCount=1 --set image.namespace=jiffy-cognitive -n jiffy-cognitive
- helm install docplit docsplit/ --set ingress.host=$clusterDNS --set image.tag=JARVIS-MAIN-DocumentSplit_1613Nov21 --set image.repository=jiffyai/docsplit --set replicaCount=1 --set image.namespace=jiffy-cognitive -n jiffy-cognitive
- ##########
(Use only in non-prod environments as a temporary measure if valid SSLs are not available.)
To Generate SSL Certificate for DB Instance and Cognitive Instance:
chmod +x generate-db-cert.sh
./generate-db-cert.sh -d {DBInstanceDomainname}
Localhost certificates for the core server are generated by ansible and are available under /tmp/{jiffyinstall}