Configure Alerts
Last Updated: Mar 8, 2023

Last Updated: Mar 8, 2023
To create alerts, users need to create Monitors, Triggers, and Destinations.
 icon and select the Alerting option.
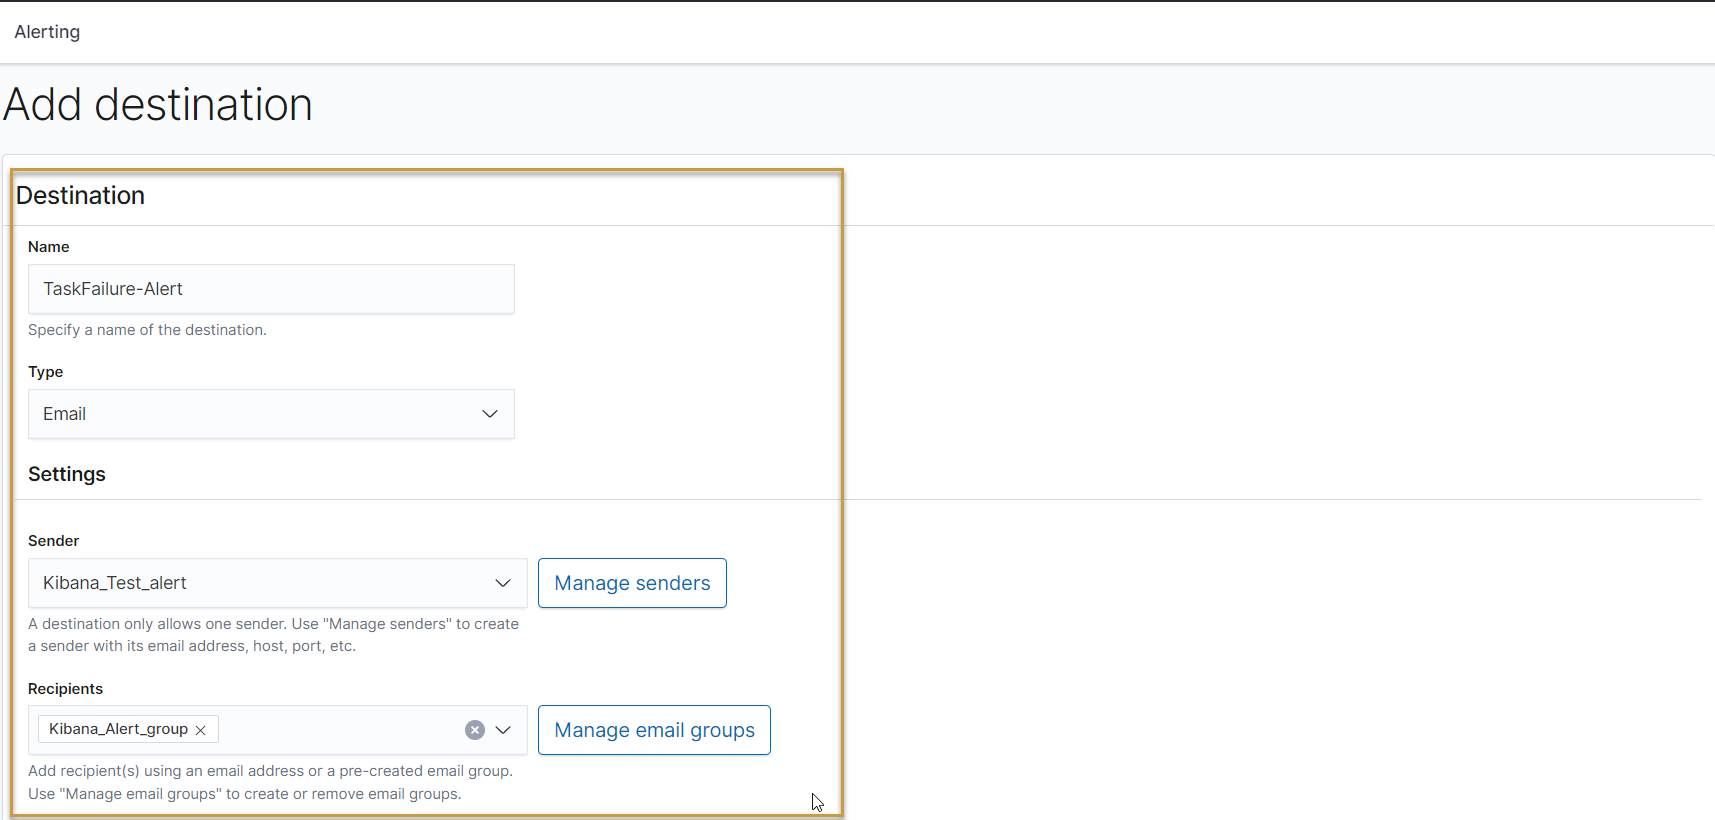
You can set the details of the recipients in the Destination field, so that the relevant alert is sent to them.

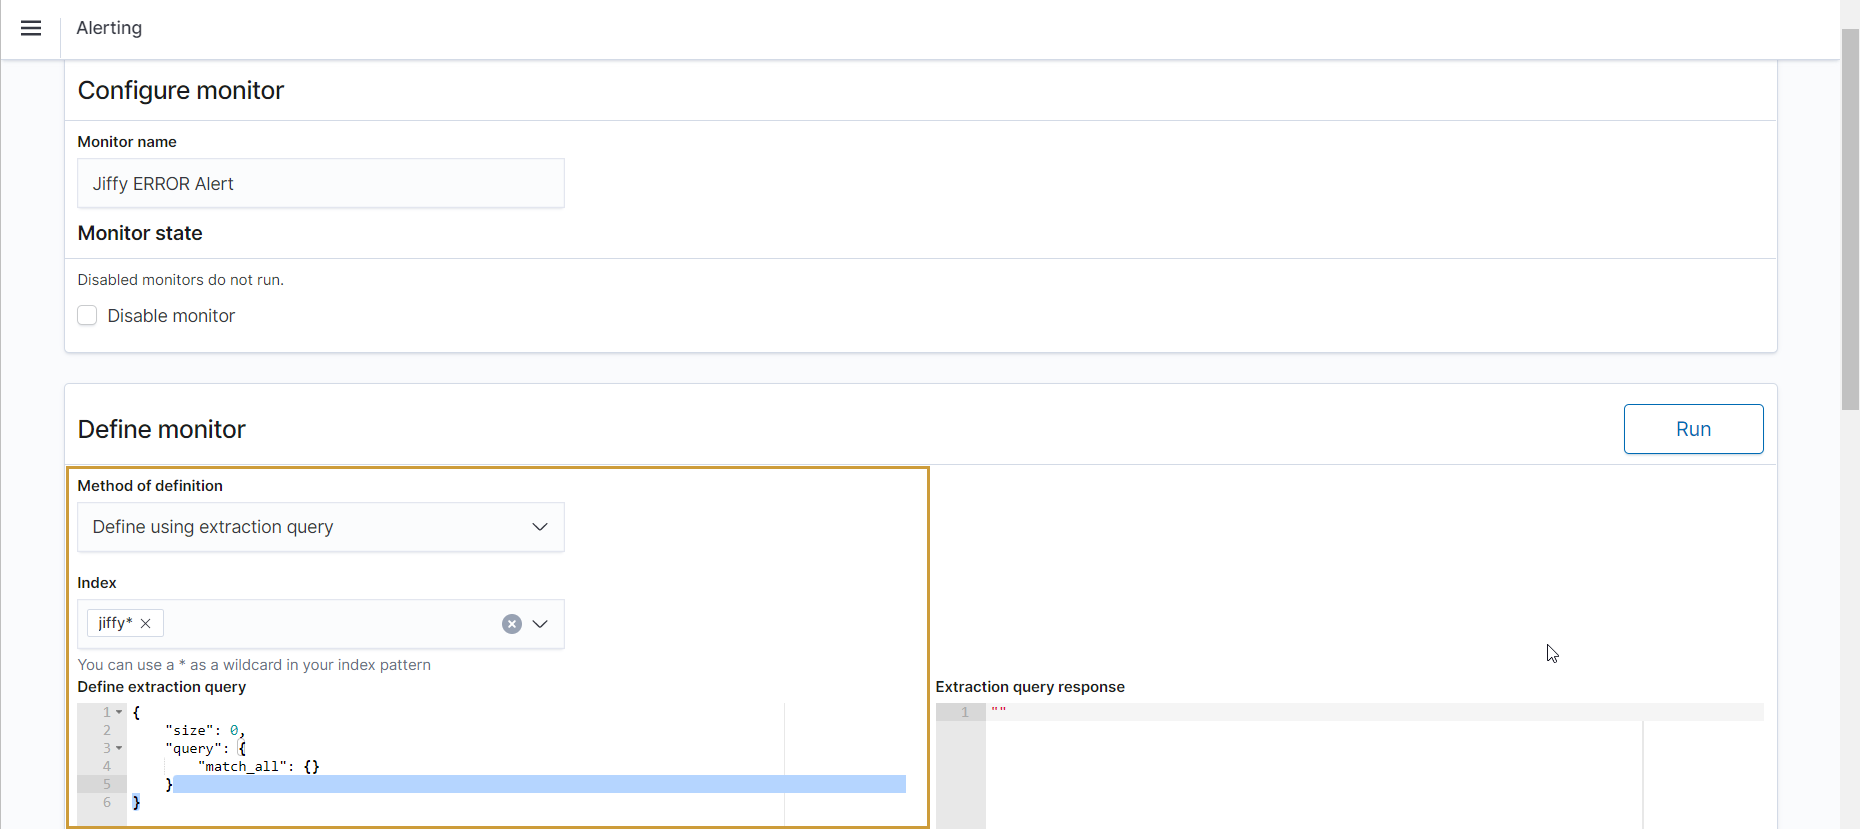
The following query is for Task Execution Failed/Execution Time exceeded.
{ "version": true, "size": 500, "sort": [ { "@timestamp": { "order": "desc", "unmapped_type": "boolean" } ], "aggs": { "2": { "date_histogram": { "field": "@timestamp", "fixed_interval": "3h", "time_zone": "Asia/Calcutta", "min_doc_count": 1 } } }, "stored_fields": [ "*" ], "script_fields": {}, "docvalue_fields": [ { "field": "@timestamp", "format": "date_time" } ], "_source": { "excludes": [] }, "query": { "bool": { "must": [], "filter": [ { "match_all": {} }, { "bool": { "should": [ { "match_phrase": { "message": "Task Execution Failed" } }, { "match_phrase": { "message": "Execution time exceeded" } } ], "minimum_should_match": 1 } }, { "bool": { "should": [ { "match_phrase": { "level": "WARN" } }, { "match_phrase": { "level": "ERROR" } } ], "minimum_should_match": 1 } },{ "range": { "@timestamp": { "from": "now-30h", "to": "now", "include_lower": true, "include_upper": false, "boost": 1 } } } ], "should": [], "must_not": [] } } }
All the monitors created are listed under the Trigger Section.

If Conditions specified in the Monitor section are met, Alerts are triggered.
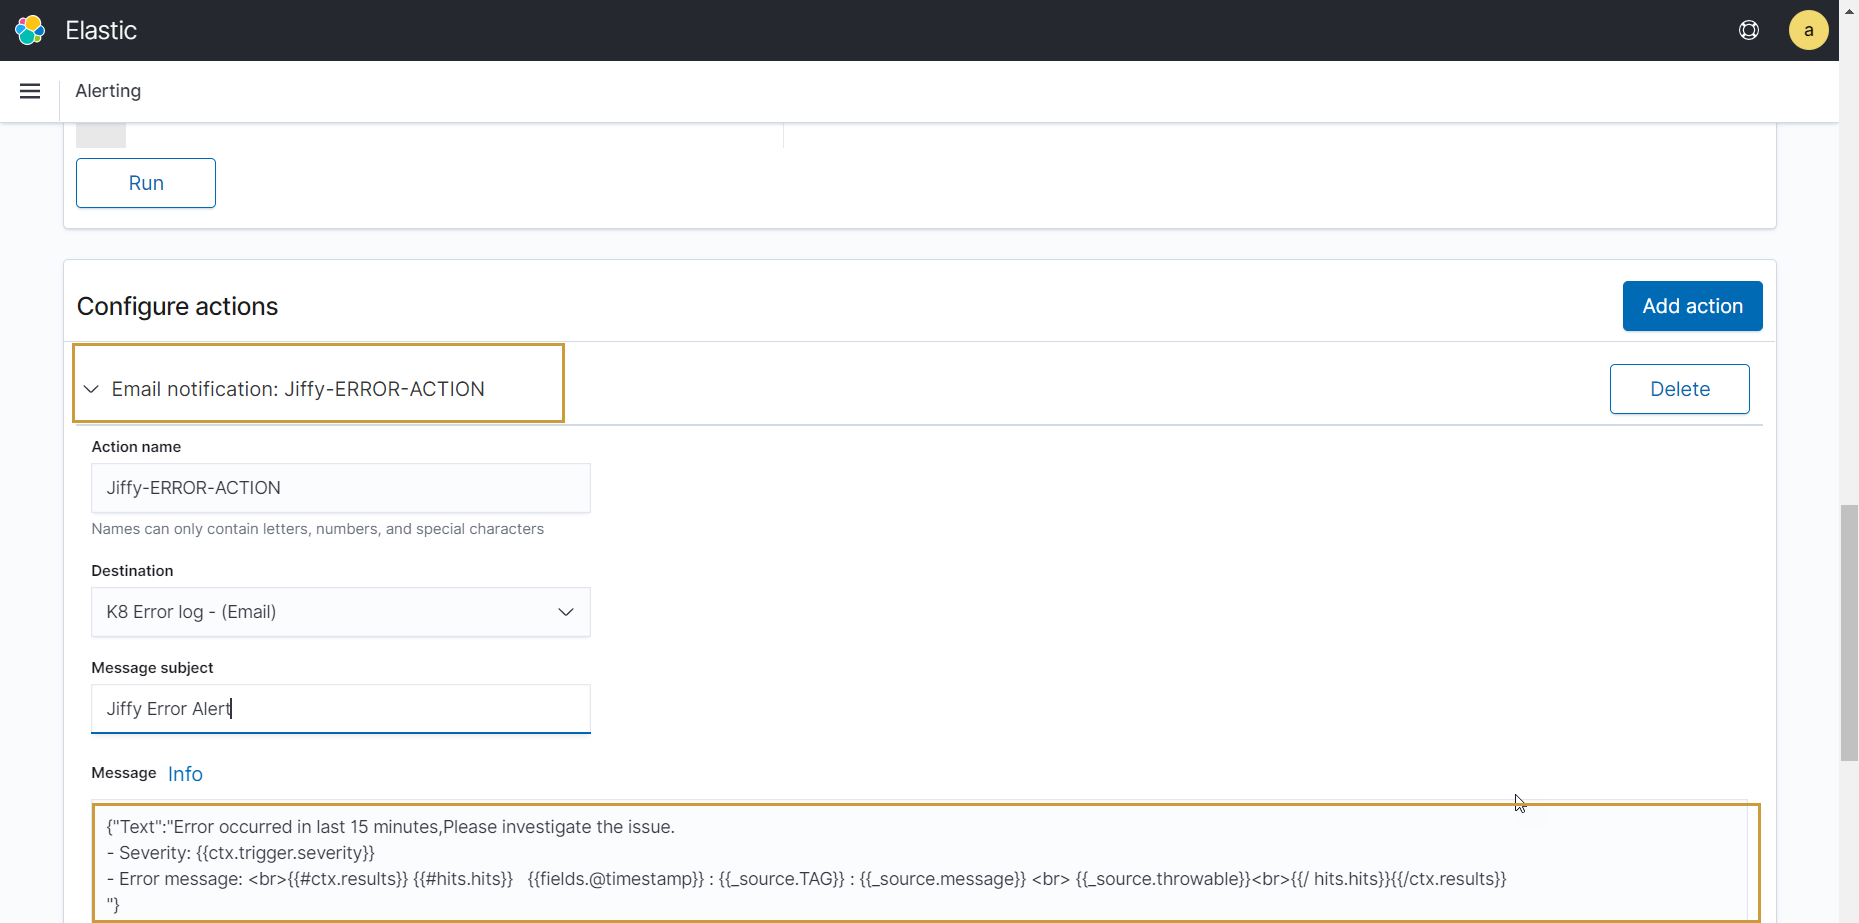
{{#ctx.results.0.hits.hits}}Monitor just entered alert status.Please investigate the issue. LEVEL : {{_source.level}} TAG: {{_source.TAG}} ERROR MESSAGE: {{_source.message}} CORRELATION ID: {{_source.correlationId}} INDEX NAME : {{_index}} TIME : {{_source.@timestamp}} {{/ctx.results.0.hits.hits}}
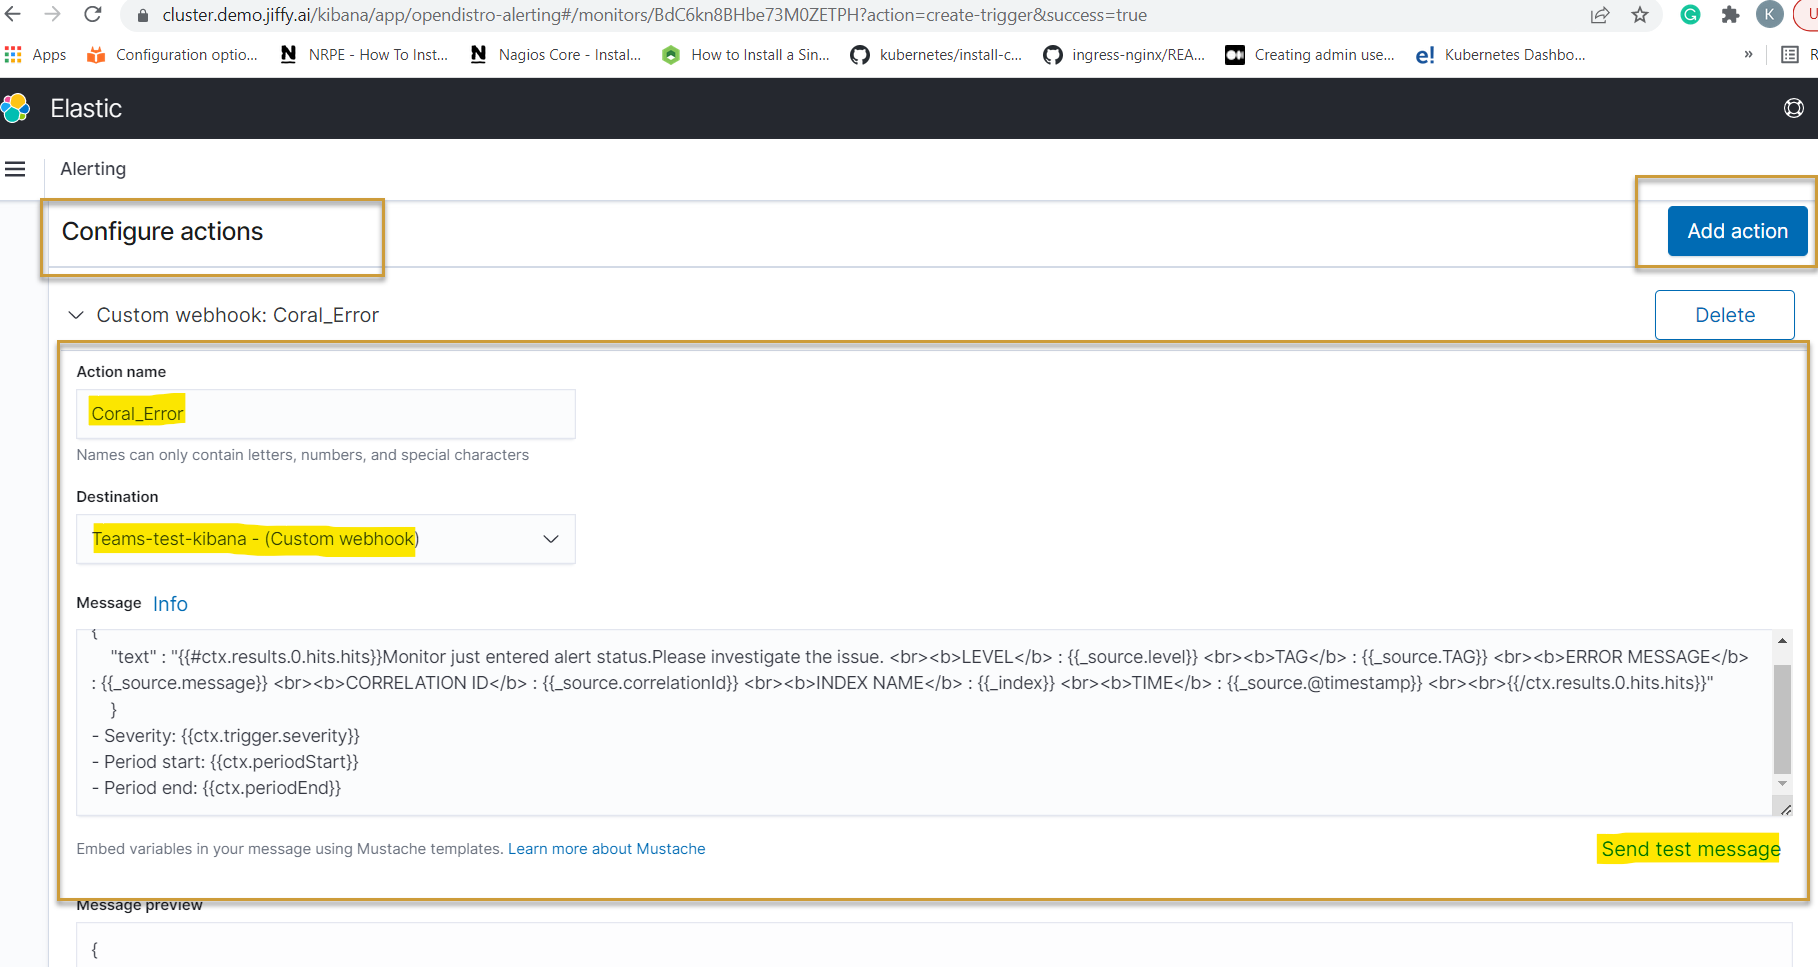
{ "text" : "{{#ctx.results.0.hits.hits}}Monitor just entered alert status.Please investigate the issue.
LEVEL : {{_source.level}}
TAG : {{_source.TAG}}
ERROR MESSAGE : {{_source.message}}
CORRELATION ID : {{_source.correlationId}}
INDEX NAME : {{_index}}
TIME : {{_source.@timestamp}}
{{/ctx.results.0.hits.hits}}" }
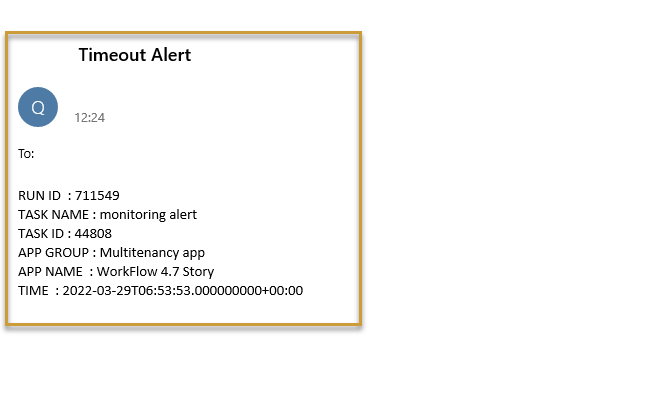
When an alert is triggered, the information related to the issue is sent to the recipients specified in the Destination.
To know more about Alerting in Kibana, click here.
