
Create Jiffy Table
Last Updated: Mar 8, 2023
Last Updated: Mar 8, 2023
Jiffy table can be created using Predefined Schemas or New Schemas.
The schemas for standard tables are available for easy use. They are:
The columns and Datatypes of the predefined columns are non-editable.
Users can define the schema by adding the fields to the table as per their requirement using the New schema.
In a Purchase Order HyperApp, Jiffy Table is created with New schema as shown below.
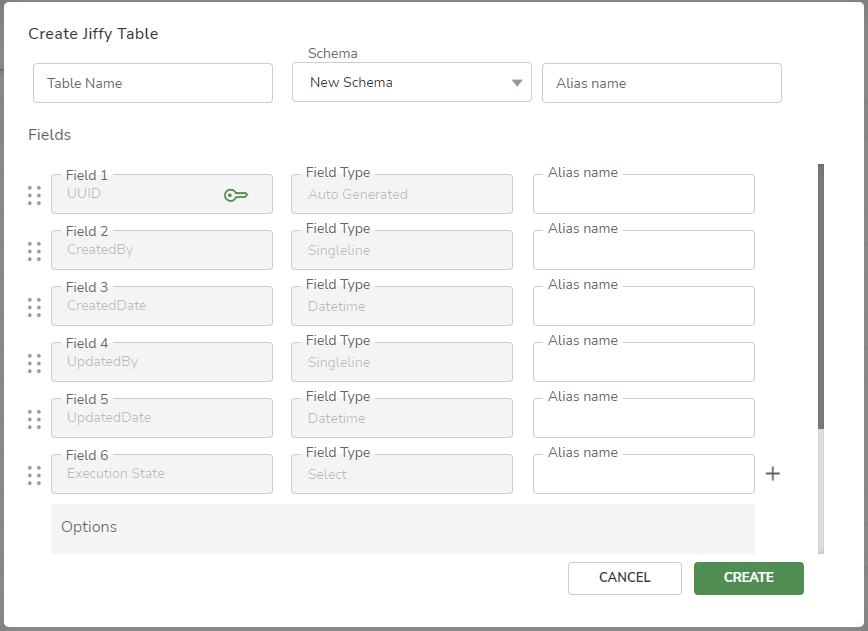
A drag handle .jpg) icon is used to drag and drop the column to the desired place for ordering the column in the Jiffy Table. The columns are displayed within the table in Presentations and Forms in this order.
icon is used to drag and drop the column to the desired place for ordering the column in the Jiffy Table. The columns are displayed within the table in Presentations and Forms in this order.
If the field type for a column is set as Table, then it will be added as an inline table to the existing Jiffy table.
You can add up to four nested inline tables.
.png) icon to define the inline table.
icon to define the inline table.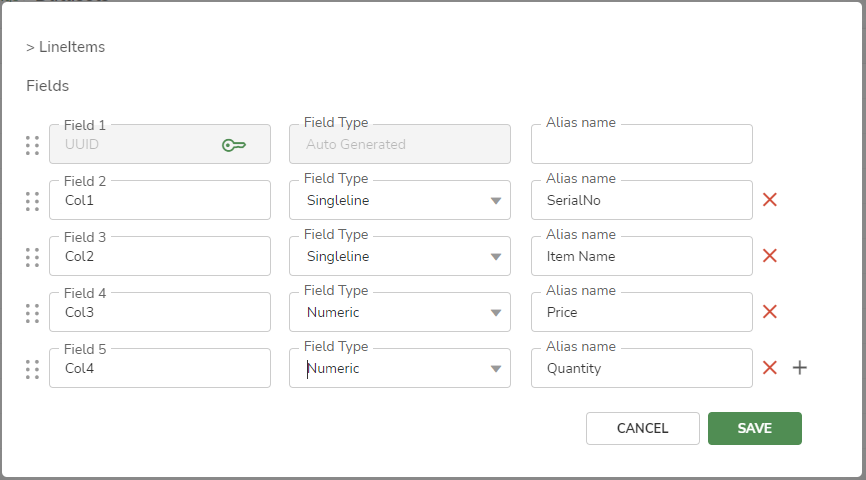
You can add Alias names for each field if required.