
Design and Execute Document Processing Task
Last Updated: Mar 8, 2023
Last Updated: Mar 8, 2023
The Intelligent Document Processing system of JIFFY.ai recognizes, classifies, extracts data from the document. It provides a Human in the loop interface to confirm and verify the Machine interpretations. It validates extracted data using a Post-Processing Task and stores extracted data in a Document Table.
You must create the Document Table before you start designing the Document Processing task.
Perform the following steps to design Document Processing Task using the Doc Reader node.
.png)
In the Properties tab, select the Document Table and Post Processing Task.
Document Table is the persistence layer to store, track and present extracted contents of the document being processed. When the task is executed, the extracted fields get populated into Document Table.
Post Processing Tasks are designed to validate the fields extracted by the Doc Reader from the document. This ensures that a check is in place and validates the fields extracted by Doc Reader. If the validation in the Post Processing Task fails, the status of the record is updated to MANUAL_INTERVENTION_VALIDATION_FAILED. The user can then re-familiarize the document to correct the fields. Validation error messages are displayed in the familiarization window.
Task is created to validate if the PONumber extracted exists in the PurchaseOrder System. When this task is run and if the extracted PONumber is not found in PurchaseOrder System, the status is updated to MANUAL_INTERVENTION_VALIDATION_FAILED. The user re-familiarizes the document and picks the correct PONumber from document.
The data for these parameters are passed from the Doc Reader node and they link the Post Processing Task to the main task.
The Post Processing Task must not contain any Doc Reader node or Task node in it.
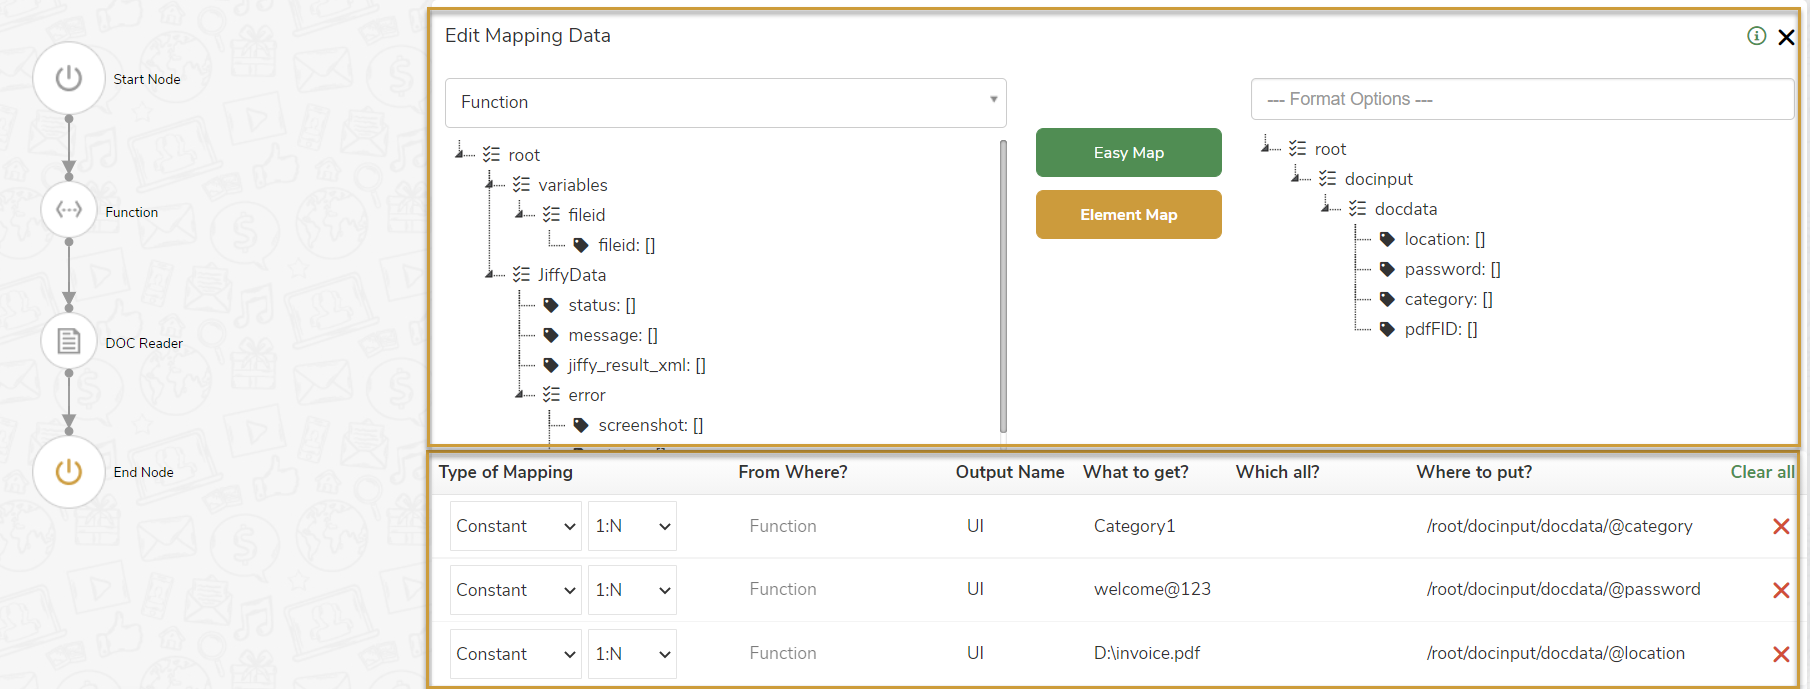
The following input parameters are mapped to Doc Reader node.
C:\Documents\Invoice.pdf
When a document is passed through Doc Reader node, it automatically classifies and assigns a category name to the document. When the document is processed by Doc Reader node, it inserts a record in the Document Table selected in Properties tab. The Document Table is populated with the assigned category. The category of the document can be defined in two ways:
You can choose a specific category for the document. Every time the task is run, the documents processed are assigned the same category that you map in the task.
You can map variables to the Doc reader node instead of providing constant values.
Doc Reader assigns a unique category for document if the Category is not mapped in the task.
When documents of similar formats are processed, Doc Reader assigns the same category to the documents. So, all documents of a similar format get assigned with the same category and the same ML algorithm gets applied for the data extraction.
If the document processed is a different template, then a new unique category is assigned to it.
When the task is executed, the fields are extracted from the document.
To know more about how to execute a task, click here.
.png)
Click the .png) icon to view or edit the Post Processing Task.
icon to view or edit the Post Processing Task.
Click the .png) to view the Result of Execution window.
to view the Result of Execution window.
The Result of Execution window displays Input, Output, and Run Info.
Navigate to the Datasets listing screen to view the Document Table specified in the task.
The Document Table is populated with default columns and the status of document is NEW_TYPE.
.png)
In addition to Doc Reader node, you can also use the following Document processing nodes based on the contents and type of document being processed