Search

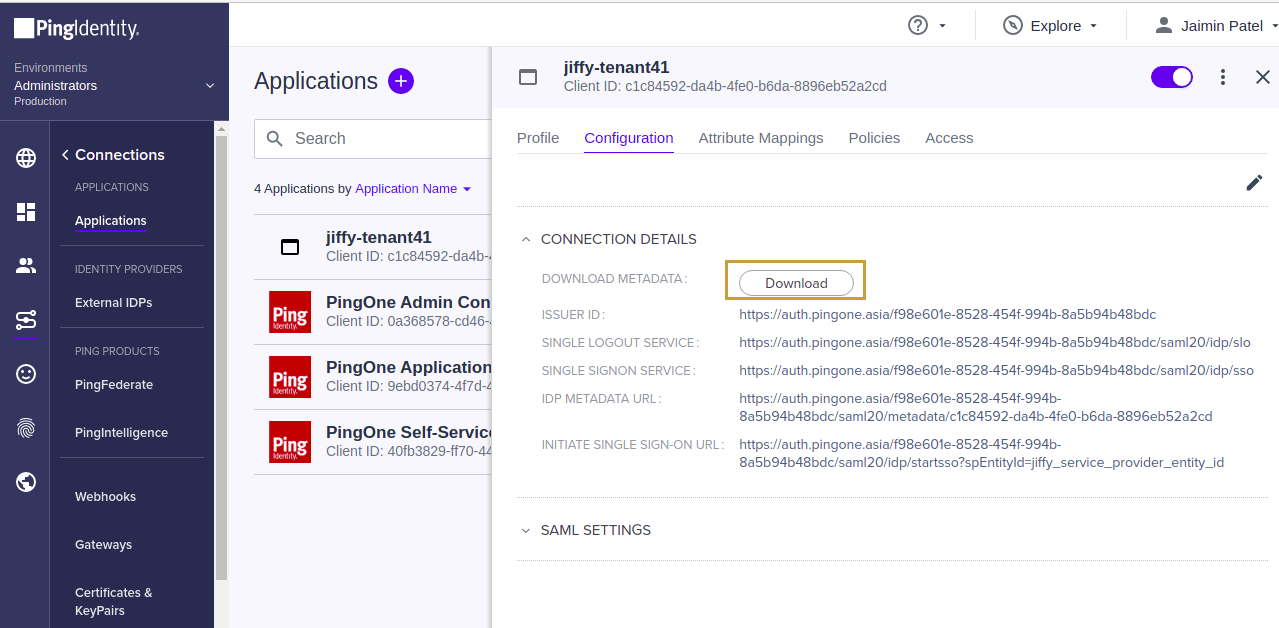
Generate IdP Metadata File

Last Updated: Mar 8, 2023

Articles

  1. Generate Jiffy Metadata file using the below API for root admin URL
  2. Download the Public certificate of Jiffy using the following API for the root admin URL.
    • API Signature: https://root.{domain}/gus/api/public-certificate
    • API Method: GET
      This API downloads the Jiffy public certificate file.

      These are public APIs and no authentication is required.

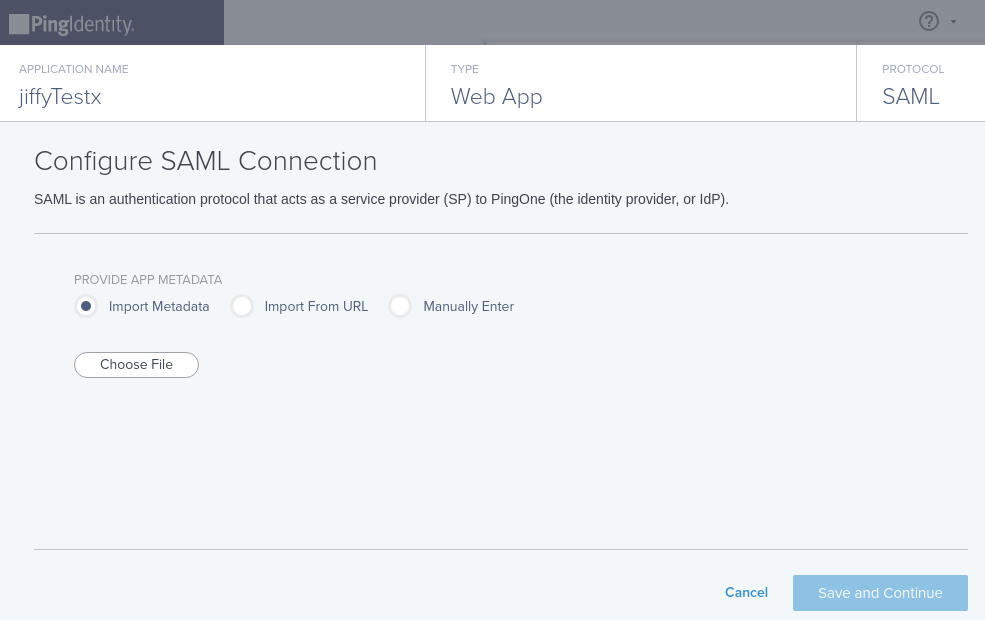
      The first two steps are to be completed from the Jiffy end.

  3. Create an application in IdP , for example, Ping Identity. This application will be mapped to Jiffy application, in this case the Jiffy tenant. To create an application in Ping Identity IdP:
    1. Click the Connections tab from the main menu panel on left-hand side. This will take you to the applications page. Click the + button at the top of the page. Image description
    2. Select Web APP and select SAML. Click the Configure button. Image description
    3. Create an App Profile. Image description
    4. Enter App name and description and click Next button. Upload an icon for the application, if required.
    5. Configure the SAML connection.
      1. Upload the Jiffy metadata file generated earlier. Image description
      2. Choose the signing algorithm in the below screen. There are three options in Ping to enable signing.
        • Sign Response: Ping sends Signed Signature in Response
        • Sign Assertion: Ping sends Signed Signature in Assertion
        • Sign Assertion & Response: Ping sends Signed Signature both in Assertion and Response. You can Choose any one option. Image description

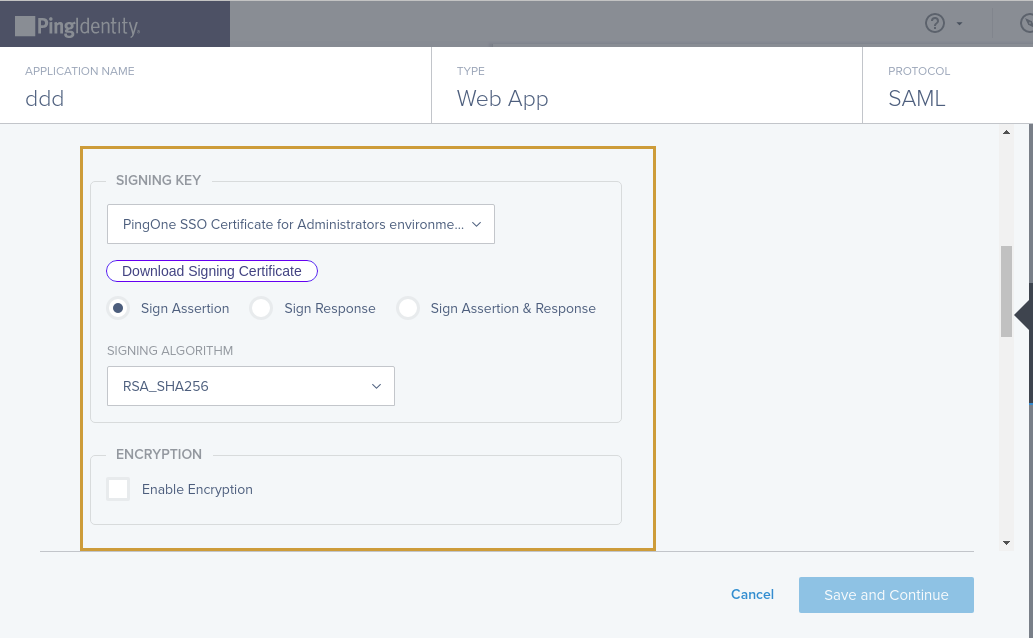
          Jiffy supports all three signing options. On Jiffy side,

          • If it detects Signed Signature in Response, then the same is validated.
          • If it detects Signed Signature in Assertion, then the same is validated.
          • If it detects Signed Signature in both Response and Assertion, it validates both. Either Response or Assertion should be signed.

      3. Enable Encryption
        • If the encryption is disabled in Assertion then, in response Ping sends assertion directly without encryption as {saml:Assertion}
        • If the encryption is enabled in Assertion then, in response Ping sends assertion encrypted as {saml:EncryptedAssertion}.
          When the encryption is enabled, you need to upload a public certificate for encryption. After enabling the encryption, upload the public certificate of Jiffy generated earlier for encryption. Image description

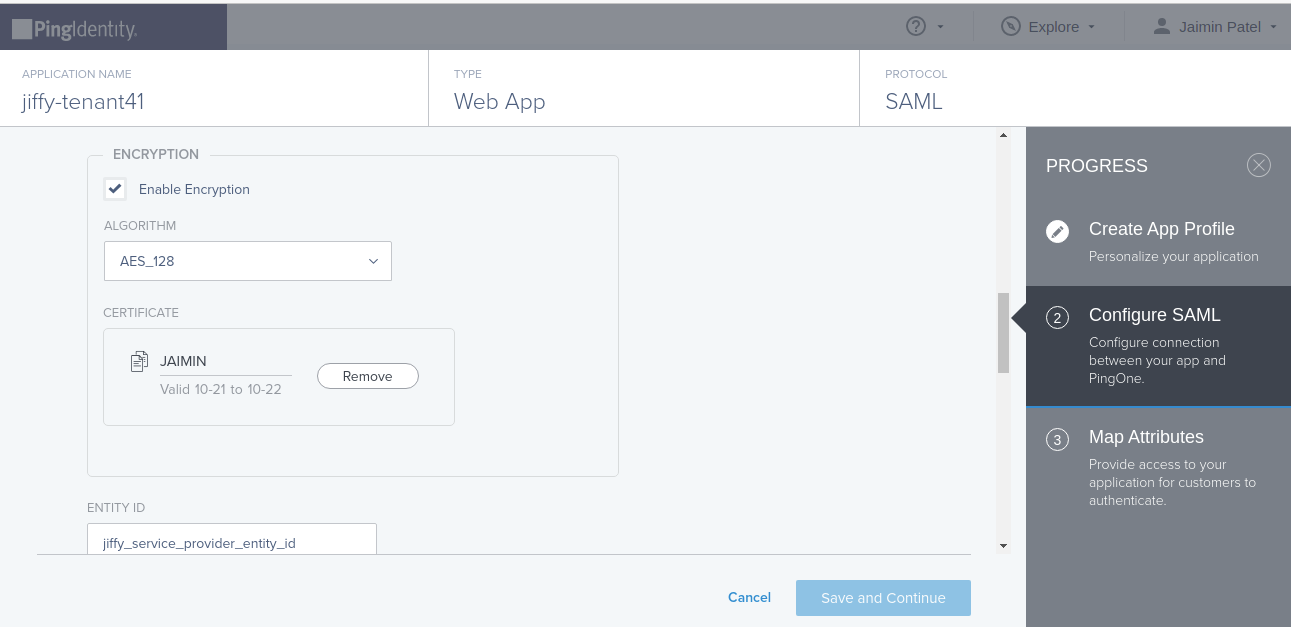
          Jiffy supports decryption of Assertion that is encrypted using a public certificate only, downloaded using the endpoint API that Jiffy has exposed.

      4. Enter the ASSERTION VALIDITY DURATION in the IdP and click the Save and Continue button. Image description
    6. In the SAML attributes page, select the OUTGOING VALUE as username from the dropdown. Click the Save and Close button.

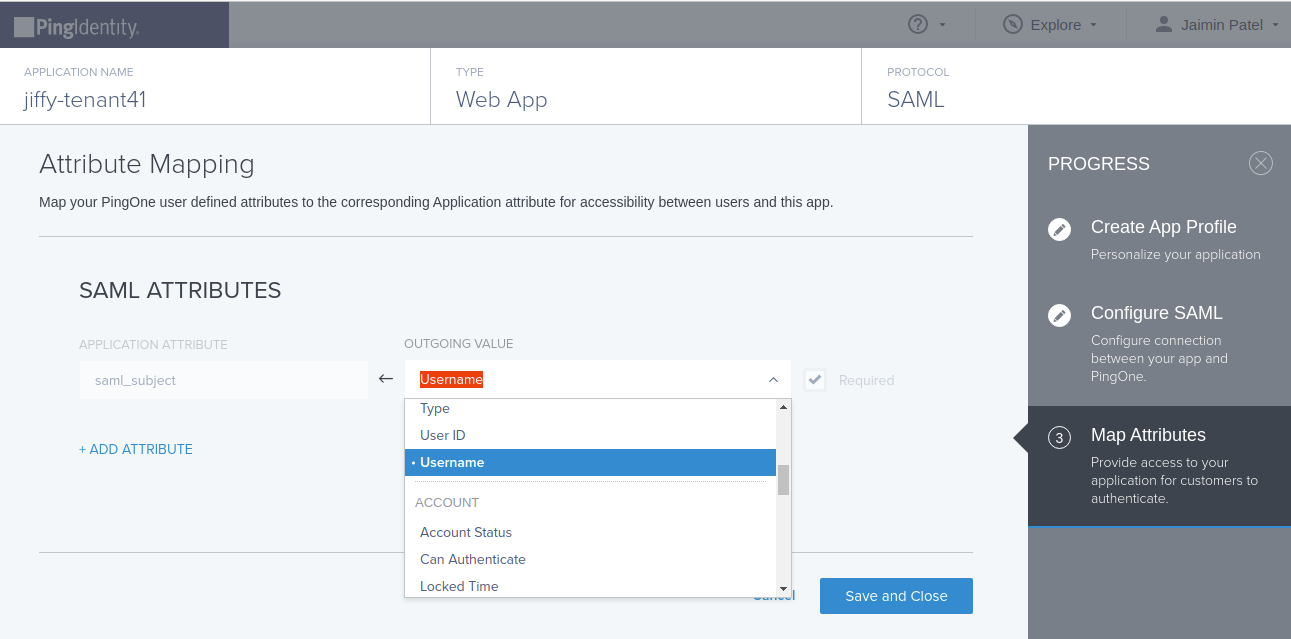
      Jiffy identifies username as a unique identifier in the SAML Assertion.

      Image description
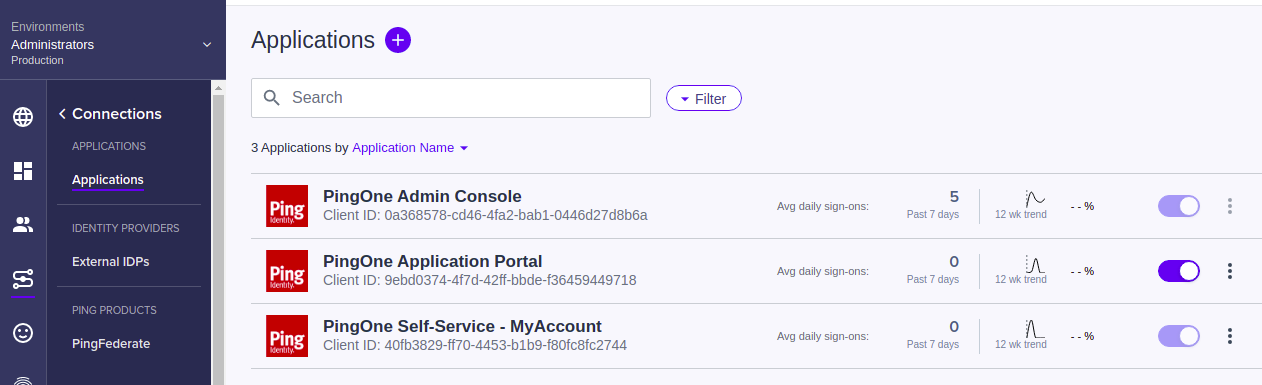
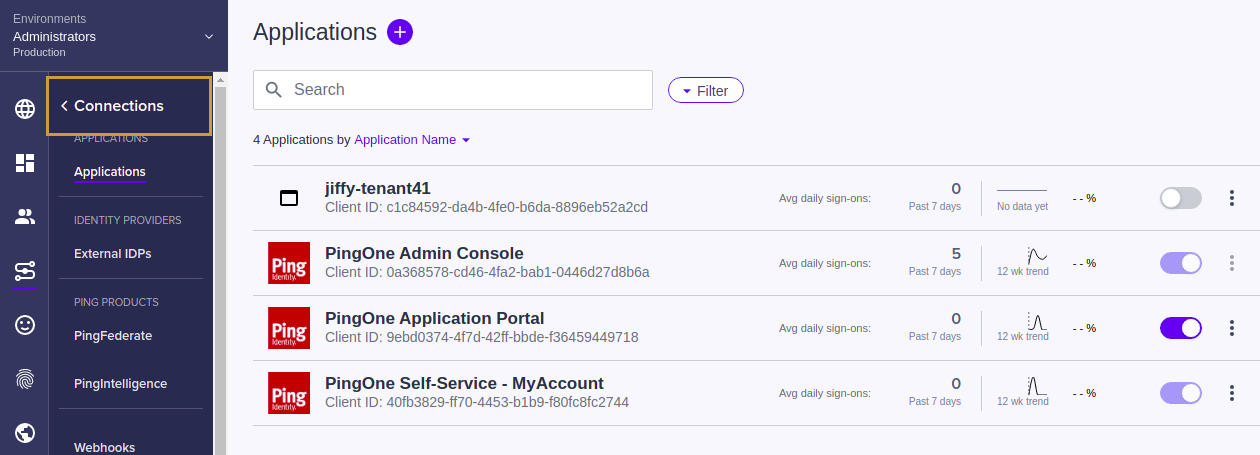
      You will be redirected to applications listing page.
    7. Enable toggle button to enable the application. Image description
  4. Generate the IdP metadata file.
    Click the application and click on the configuration tab in the application. Click the Download button to download the IdP metadata file. Image description
Did you find what you were looking for?